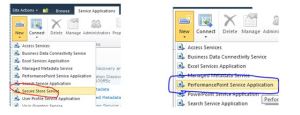
i) “I have already granted permission to ABC to this folder but he says he dont see the files in it”.
ii) “I have already granted permission to ABC to this folder but he gets access denied”. Huh ??
worst still ..
iii) “Her document is lost/missing !!! Please retrieve it for me” or “This SharePoint link is broken”
The first 2 are quite straight forward but the 3rd one is a bit tricky. It may mean the file/document was actually or accidentally deleted. It may also mean, as in some cases, incorrect permission assigned or existing permission purposely or accidentally removed.
So what's up ?? First, let's look at the basics.
# 1 : There are four areas where we can set permission

# 2 : Two types of permission settings

# 3: Common permission levels (not all are shown here)
1. Full control - Highest permission level
2. Contributor
3. Read - Lowest permission level
So far so good ?? Let's take some quiz.
Quick quiz # 1:
Question: What happens is I assign different permission levels to the same person different at the same area?
Answer: If you assign different permission levels to the same person in the same area, the highest permission will take effect.
Example: Let’s say, I have a site called Fun and I give ABC contributor access (direct permission). ABC now has contributor access. Then, if I add ABC to the site owner group (which has full control), ABC will have full control on this site.
Quick quiz # 2:
Question: What happens if I assign the same person different permissions in the lower area as compared to a higher area (unique permissions configured)?
Answer: If you assign a different permission level to the same person in the "lower area", the lower area setting will take effect.
Example: Let’s say, I created a subsite “More Fun” under the site “Fun”. I make it a subsite with unique permissions and I don’t add (in other words, I removed) ABC from the subsite owner’s group and don’t give him any kind of access to this subsite. Effectively ABC will not even know the subsite exists. He won’t see it. So it doesn’t matter what is the setting on the higher level area, the lower level area setting will take effect.
Note: This also means that if you create a subsite (or document library, folder or file) with unique permission and accidentally remove your own access from it, you won’t be able to access it or see it.
Okay now, let’s get back to the issues.
Issue # 1: “I have already granted permission to Alan to this folder but he says he don’t see the files in it”.
Explanation: ABC was given access to the folder. That means he will see all the files in it that has inherit permission defined. He will not see any documents that have unique permission configured. So if you have any document with unique permission, you need to specifically grant ABC access to them as well. Quite troublesome ha?? I couldn’t agree more with you on this. But this is how permission works (and should work) in SharePoint.
For example, below is a document library which has 2 documents in it.

I have set the first document (titled SharePoint Replication) to have unique permission and didn’t give ABC permission to it. So when ABC come to this document library, he will see it as below,

Issue # 2: “I have already granted permission to ABC to this folder but he gets access denied”. Huh ??
Explanation: If you grant access to ABC to a document library, he can only see and access all the folders and documents that reside under that document library that has inherit permissions setting. If ABC is trying to click a link that points to any folder or document under a folder that has unique permission (and he was not given permission to it) , he will get the Access Denied message. Makes sense? Different symptom but same reason as Issue # 1.
By now, you would have gathered that Issue # 3 has been explained above. It’s just different symptom for the same reason.
Next logical question would be : - What would be the best practice to avoid all these confusions and issues ?
Well the answer is quite straight forward:- Configure permissions at site and document library only unless there is a strong reason for configuring unique permission at the lower levels (folders, sub folders and documents). Unique permissions give us the flexibility. But this flexibility has its downside. It can be confusing at times.
Do you know you can create additional document libraries and give them unique permissions? You don’t have to live with the pre created Shared Documents!!
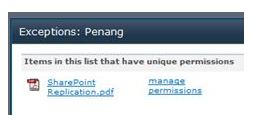
If you still have very strong reasons to apply unique permission at folder, subfolder and document levels, by all means, go ahead. But be sure to click on the Show me uniquely secured items of this list to identify all the unique folders and documents and assign permissions accordingly.
In our example, you will see the below screen. So you need to click on the “manage permissions” link and assign permissions accordingly.

Happy reading and have a productive day ahead !!


